The truth is that the digital age has its pros and cons. As pros we can obviously count the speed with which the information is distributed and how easy it can be read by anyone, but when we look at the cons, it is very easy to create news that seems real and distribute them. It here where we can perform a couple of verifications to check if a new is real or not, and what better way to explain it than with an example … lets go!

Context

A few days ago my mother-in-law sent a link for a natural medicine that seemed to have everything she needed, and she asked us what we thought about it and if we could buy it.

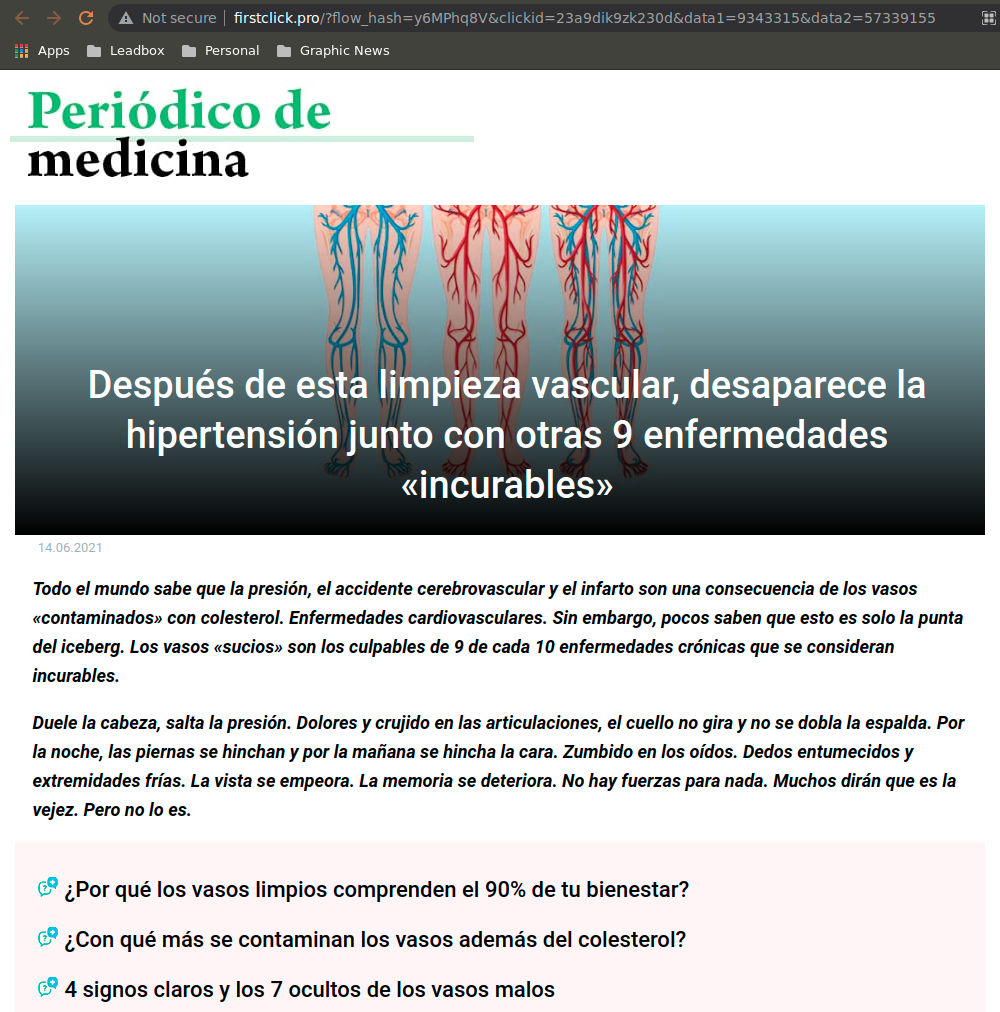
Suspicious Links

First thing we saw is that this link was obviously not coming from any known news portal, it doesn’t even has a name to make us believe such a thing. And not just that, if we click on the link itself, it gives us a 404 error, so they didn’t even put some effort into making a front-page.

Additionally, the logo of the so-called “newspaper” is also not clickable, which indicates that you can’t even see if they have any other articles. We realize immediately that this article was hand-made.

Finally we realize that the url includes a flow_hash that is nothing more than an algorithm for data collection, which sends a lot of your data for analysis once you click it and that they are probably monetizing this link (either charging for advertising or PPC)

Fake Doctor

They speak about a certain Miguel Suarez, who is part of the Department of Vascular Surgery at the National University of Medicine. practicing neurosurgeon, honored physician from Colombia. And here we realize of the scam, because in the article they do not call him “Doctor” but “Sr” … Did you notice?

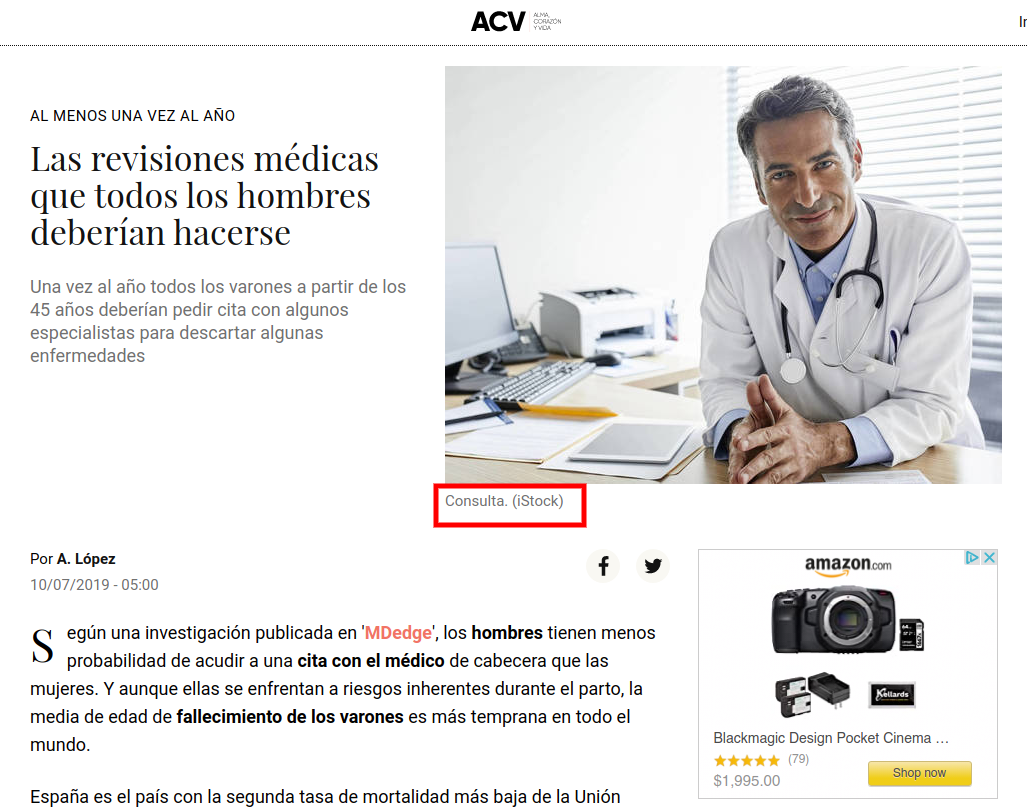
In addition to this, it should be noted that they added a fabulous photo of Mr. Suarez to get along with the article, but there is a very easy way to verify if this photo is actually from who they talk about. All we have to do is this:

  • Download the image by right clicking and saving to your computer.
  • Go to google.images and press the camera icon in the search box.
  • Add the picture and search.

This will perform a search based on images and not on content where you can see which portals are using the same photo. The logical thing would be to find many photos of this Suarez in different articles endorsing the news of this new medicine, but truth is, we found anything related.

Instead, we found that this was a stock photo, a photo produced in a studio to be sold on gallery portals so that this content is used by people who do not have photos to fill their articles… It’s a Catfish.

At least one of the links where we verified the information had the decency to put that they got the pic from istock.

Special sell or single seller

Finally, to kill my curiosity, the article indicates that this medicine can only be purchased through this website since pharmacies stopped selling it due to its effectiveness. However, if you look for the product at mercadolibre (like ebay for LATAM), you realize that they also sell it there … BUT BEWARE … absolutely all sellers have the same photo of the product and there are no “real” photos of this product…

Of the 11 articles that offered this medicine, all were linked to only 3 sellers in total, all selling from the same location and almost with the same name… come on, if this were a revolutionary medicine, everyone would want to sell it. Right? Anyway, and to make the story short, when reviewing comments in detail we found the icing on the cake lost in a sea of false comments. “They sell counterfeit product.

Just out of curiosity I searched at mercadolibre different countries website (it’s country located), and this medicine didn’t even exist. I also asked pharmacies if they had ever sold it, and neither… Verdict… it’s a Scam.

The point of this article is not to discredit the medicine itself, if you consume it and it does you good, fabulous, leave me a comment and that’s it. But the topic here is that’s it’s awful to share information about miraculous medicines that surpass a real medical evaluation, offering themselves as salvation in the middle of a pandemic where many are looking for an angel in the middle of their journey.

Have you found links like this? Tell me about! now you now know how to verify if this is a real or fake news.


This post has a nicer formatting that can be seen at it's original source at tatica.org , so feel free to hit the link and read better version!

I’ve owned a TaoTronic TT-BH22 headphones with noise cancellation for a while ago, and I can tell you that despite being quite cheap have worked perfectly for me. Battery life is fantastic (around 40 hours) and noise cancelling, even if it’s not 100% perfect as the professional ones, is more than acceptable.

However, then I bought those I didn’t realize that they had an integrated microphone, and I think that during the first year of use I left this feature forgotten and unused since my SO didn’t recognized it right away. Sad thing is, it wasn’t until my husband tried them on his laptop and his SO recognized the microphone, that we knew about this.

And even sadder than that? We both use the same SO… so it was time to work around this and figure out why it was working on his laptop and not on mine, so if anyone has encountered an issue like this, here’s a solution that should work with every headphone with a built in microphone just like mine.

All problem was this: Like this headphones have a high fidelity sound  (Hi-Fi)  my system didn’t recognized them as regular headphones and “assumed” they didn’t had a microphone, that was it…

Now it was just time to configure correctly the headphone type, however, KDE’s Bluetooth config app is too simple and doesn’t allow more advanced settings, so I installed blueman, which is Gnome’s Bluetooth settings app and allowed me to configure easily my little gadget without going to the terminal. So lets install blueman as root:

[root@libro ]# dnf -y install blueman

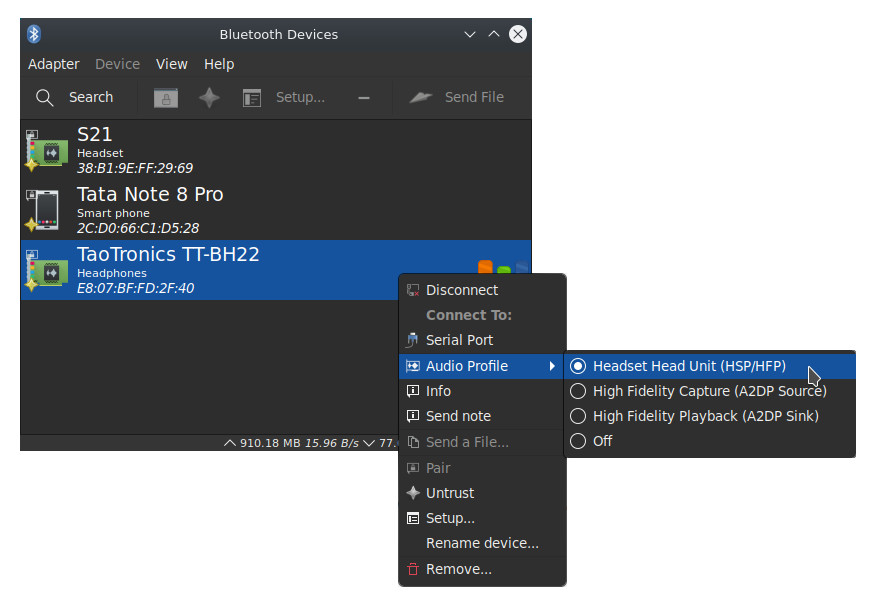
And with this app we can configure our Bluetooth devices better. when we open the app the first thing we see is the list of recent devices.

  • We will locate our headphones on this list and right-click it to see the menu.
  • Will select the option “audio profile” .
  • And finally select the option Headset Head Unit (HSP/HFP).

And that’s it, you should be able to see your microphone between the audio device list and select it.

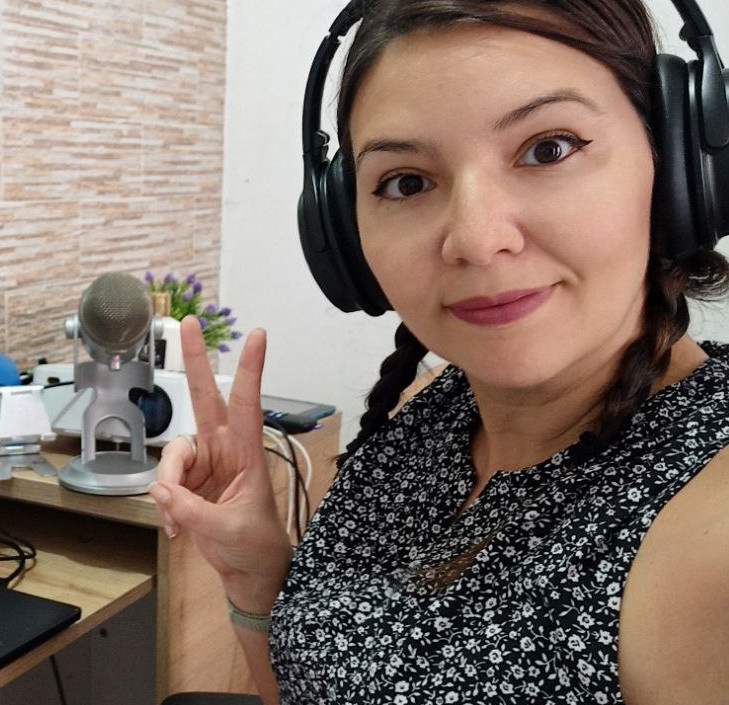
Now this happy girl can walk around the house while makes herself a coffee in between the million meetings we have now during this pandemic.

Let me know if this worked for you, and specially, which headphones did you configured so I can add them to this list.

  • TaoTronics TT-BH22

This post has a nicer formatting that can be seen at it's original source at tatica.org , so feel free to hit the link and read better version!

When we are creating a book that will be published at Amazon Kindle Store and we want it to be printed as well as digital, we need to have some important considerations when comes to create the cover.

It’s not just about having an attractive cover that encourage readers to buy, but it also has to be functional when comes to content, paper type and even the thickness of the book itself. Anyway, the idea is to have a working cover that won’t ve rejected by the automated verification process that Amazon holds.

When comes to select our book properties, we not just have a wide sizes variety, but also we have to decide is it will be printed on black/white or color. Besides, we will have to choose the thickness and quality of the paper, so we can begin to estimate the size and cost of our book.

For this example, we will assume we are creating a cover for a 6″x 9″ (15.24 x 22.86 cm) book

The most important when comes to create a book cover are the dimensions, since it won’t matter to have a fantastic cover that crops, is unreadable or is misplaced and not aligned correctly. This is why we will use an online service that will help us run the necessary calculus to save time and effort:

Lets asume we have a 100 pages book, and we will use a White paper for color impressions.

This type of paper has a thickness of 0.002347″ (0.00596138cm)

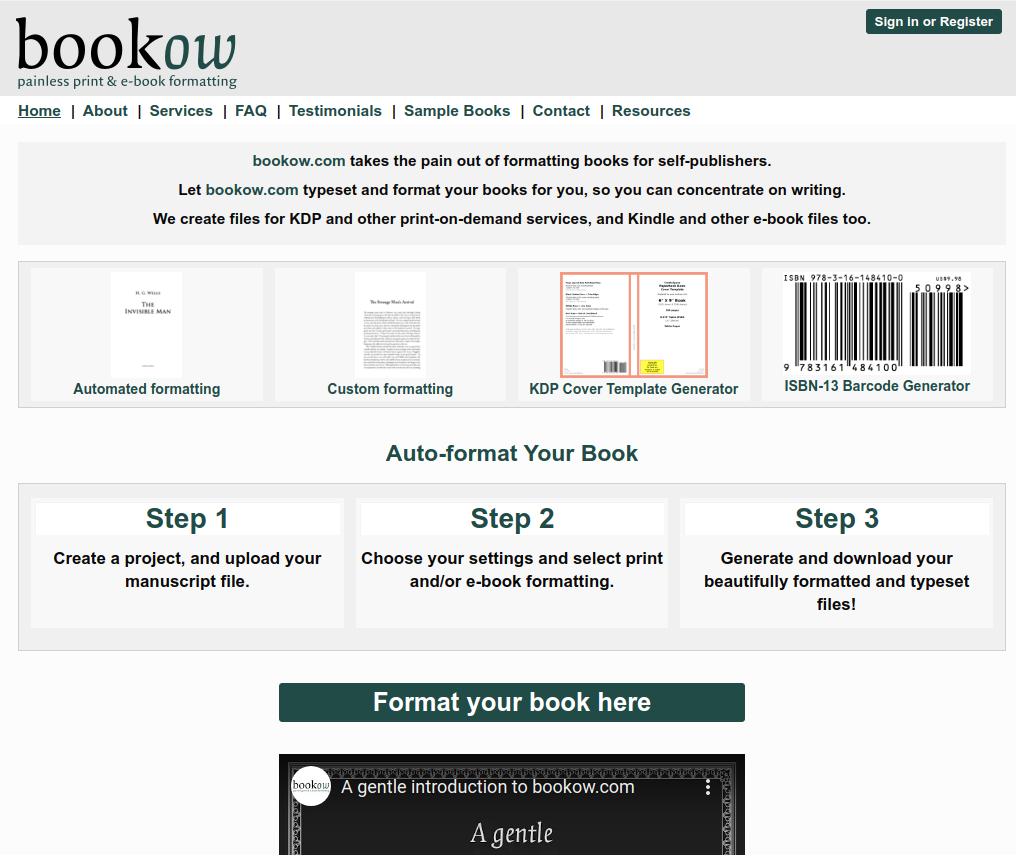
This web allows us to play with several options that include pre-formats to start writing our books, generate the ISBN bar code, but the option we really need is the KDP Cover Template Generator. So click on it

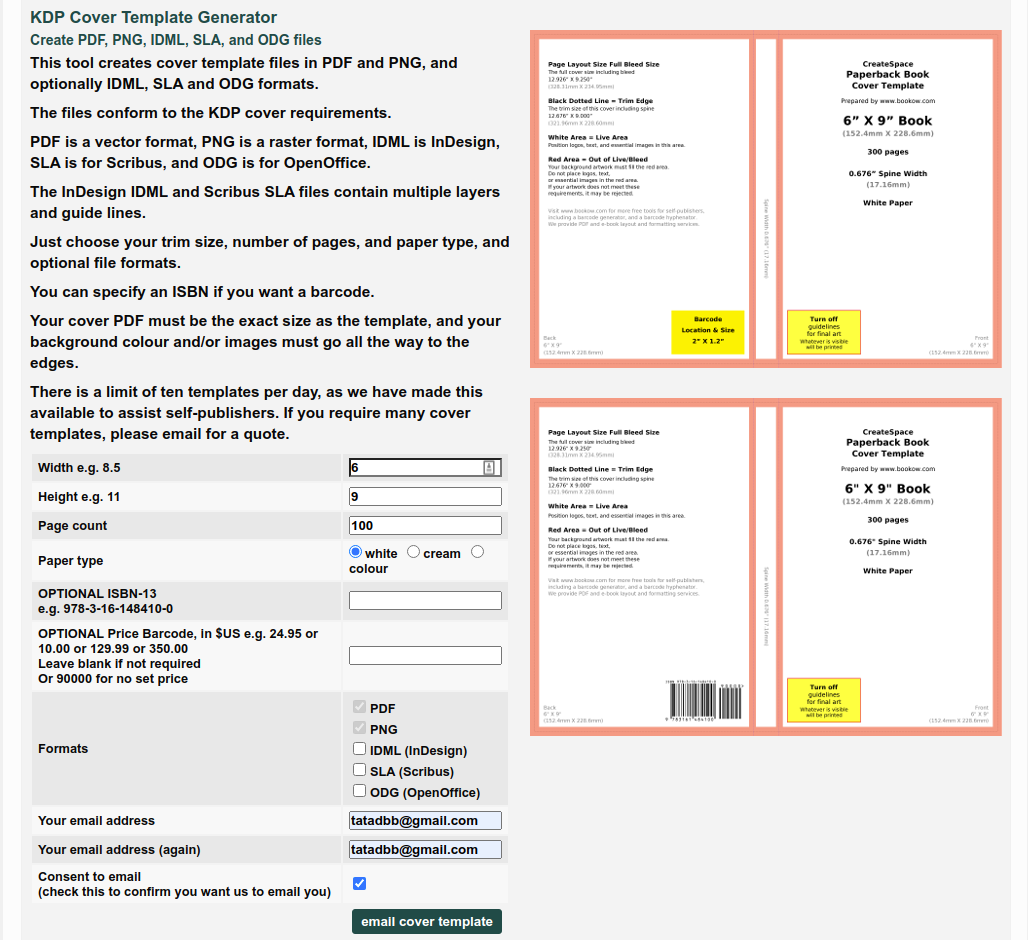
On this form, we will have to fill the data requested on each field just as follows:

  • Width: 6
  • Height: 9
  • Page count: 100
  • Paper type: select white colour
  • OPTIONAL ISBN-13:Leave this in blank
  • OPTIONAL Price Barcode: Just leave this in blank
  • Formats: Select the ones that I put on bold, which are usually already marked
    • PDF
    • PNG
    • IDML (InDesign)
    • SLA (Scribus)
    • ODG (OpenOffice)
  • Your email address : hi@gmail.com
  • Your email address (again): hi@gmail.com
  • Consent to email: Check this last field to consent that you want them to send you an email.

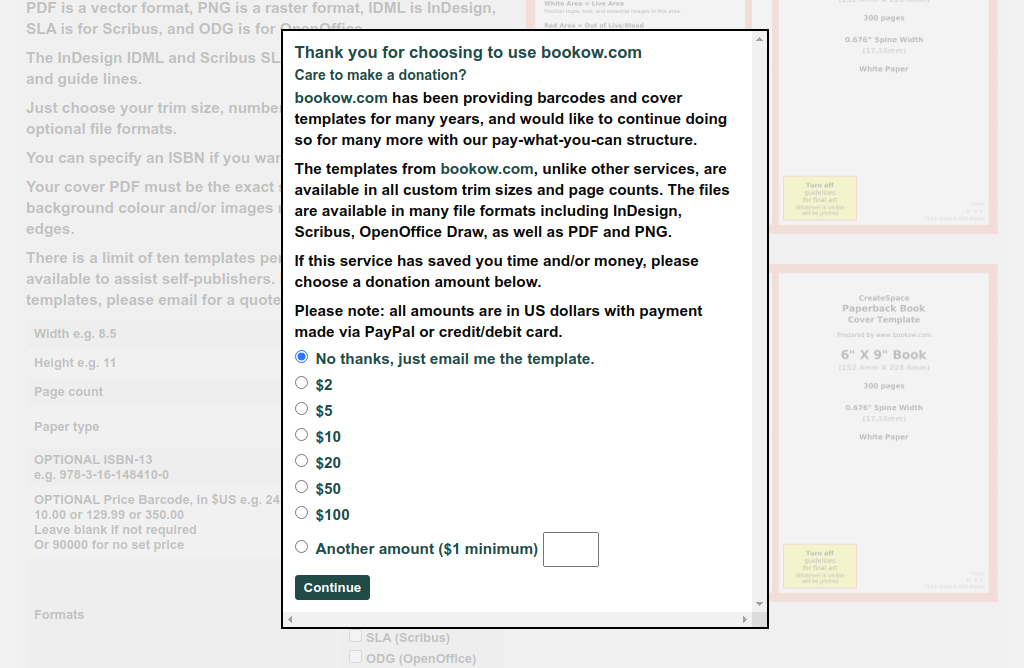
Finally click on the “Email Cover Template” button and this will display a popup with the option to leave a donation. Remember to always leave a tip if you can since this services don’t have funds beyond their own users.

If you can’t make a donation, then simply select the first option that says “No thanks, just email me the template” .

Either you make a donation or not, you will finish the process with this donation page again, but this time with a success message that ask you to check your email and download your guides. Just do so and download either the png or pdf with the desired layout. I’m gonna open it with inkscape to start designing my cover.

We add the image with our layout to inkscape and adjust the size of the canva to the one at the image (the outside). This will allow our design to already include the cut margins or bleeds that always give us a headache.

We will design our cover following the guide lines and respecting the margins, only writing our content on the white parts of the layout. We will include our title, images, description but remember to leave the space for the ISBN since Amazon will add it automatically in case you don’t have one.

It’s important to mention that the section we usually forget is the name at the book mold. Make sure that this text is within the white line at the very center of the layout without touching the red border so it pass the Amazon KDP filters.

To work more comfortably, I set the layout image to a 60% opacity and put it on top of everything, that way I was able to see every element below the layout and move them better. But this is just a personal recommendation.

Once happy with your design, just delete the layout image, export your cover at 300DPI and you will be set to upload it at Amazon KDP.

Let me know if this tutorial was useful and if you created your book cover easily with this tips!


This post has a nicer formatting that can be seen at it's original source at tatica.org , so feel free to hit the link and read better version!
This days I had to send a multiple page PDF with a bunch of pictures on it, but requirements said that it needed to be smaller than 5Mb. With Ghostscript I was able to transform a 10.9MB file into a 1.2Mb without loosing quality, since it was mandatory that the small letters contained on the PDF were completely readable.

To work with ghostscript first you need to install it:

[tatica@libro ]$ sudo su –

[root@libro ]$ dnf -y install ghostscript

Then we exit the root mode and locate at the folder where we have the file, in my case:

[root@libro ]$ exit

[tatica@libro ]$ cd /home/tatica/Documentos/archivo-maestro.pdf

To run ghostscript let me first explain you the options you can choose, and what you can archive with each one of them:

/prepress (default) Higher quality output (300 dpi) but bigger size

/ebook Medium quality output (150 dpi) with moderate output file size

/screen Lower quality output (72 dpi) but smallest possible output file size

In my case, I want the file to be compress, but not to loose quality, so I ran my script with the ebook option:

gs -sDEVICE=pdfwrite -dCompatibilityLevel=1.4 -dPDFSETTINGS=/ebook -dNOPAUSE -dQU
IET -dBATCH -sOutputFile=archivo-resultante.pdf archivo-maestro.pdf

and that’s it. Remember that the output file comes first, and the file you want to convert comes at last (I know, tricky). If you used it, let me know how did that work for you!


This post has a nicer formatting that can be seen at it's original source at tatica.org , so feel free to hit the link and read better version!

I’ve been trying Canva since a few months ago, and truth is, it has blown my mind. HEY, I still LOVE inkscape, but when I started giving workshops to people who wanted to improve their social networks, reality was that my students were not experts on design, and tools like this became my allies.

I’ve always supported Freeware, since those are simply apps that have a free version along their paid features. Best from Canva is that their free version doesn’t expire, which is definitely a highlight. And that’s why today I want to tel you some of the pros and cons that I found along the way.

NOTE: This is a comparison made between Inkscape (in case you’re an Illustrator user the comparison would fit just fine)  and Canva’s free version.

Inkscape

Pro

  • Absolute control over vectors, both in shape and color.
  • Absolute control on gradients.
  • Wider design freedom.
  • Export to any available format.
  • No need for an internet connection to design.
  • Editable vector that works on any design app.


Cons

  • Final original vector files are larger, so take longer to share (specially when you embed a bitmap)
  • If you want a template, you have to download it.
  • If you want to add some graphics, same, you have to download them>

Canva

Pro

  • Real time contribution.
  • Graphics and Photos gallery included (quite enough even at the free version)
  • Pre-built Templates to save time (both static and animated)
  • Graphics available at your computer and phone. (only online)

Cons

  • Terrible gradient management.
  • Only png downloads available (free)
  • Can’t add fonts (free)
  • Can’t edit shapes, and several times, can’t edit colors either.
  • No internet, no Canva.

Which one is the best? It will depend on the purpose you need. Truth is that the high content demand that comes from social media and the insane grow of creators, has lead to this kind of graphic assistant to become into a necessity.

Both apps have their pros and cons, and at the end, which one to use will only depend on the expertise of the designer, and the future uses for the graphic you want to create.

and you, what’s your opinion on both apps?


This post has a nicer formatting that can be seen at it's original source at tatica.org , so feel free to hit the link and read better version!