I’ve owned a TaoTronic TT-BH22 headphones with noise cancellation for a while ago, and I can tell you that despite being quite cheap have worked perfectly for me. Battery life is fantastic (around 40 hours) and noise cancelling, even if it’s not 100% perfect as the professional ones, is more than acceptable.

However, then I bought those I didn’t realize that they had an integrated microphone, and I think that during the first year of use I left this feature forgotten and unused since my SO didn’t recognized it right away. Sad thing is, it wasn’t until my husband tried them on his laptop and his SO recognized the microphone, that we knew about this.

And even sadder than that? We both use the same SO… so it was time to work around this and figure out why it was working on his laptop and not on mine, so if anyone has encountered an issue like this, here’s a solution that should work with every headphone with a built in microphone just like mine.

All problem was this: Like this headphones have a high fidelity sound  (Hi-Fi)  my system didn’t recognized them as regular headphones and “assumed” they didn’t had a microphone, that was it…

Now it was just time to configure correctly the headphone type, however, KDE’s Bluetooth config app is too simple and doesn’t allow more advanced settings, so I installed blueman, which is Gnome’s Bluetooth settings app and allowed me to configure easily my little gadget without going to the terminal. So lets install blueman as root:

[root@libro ]# dnf -y install blueman

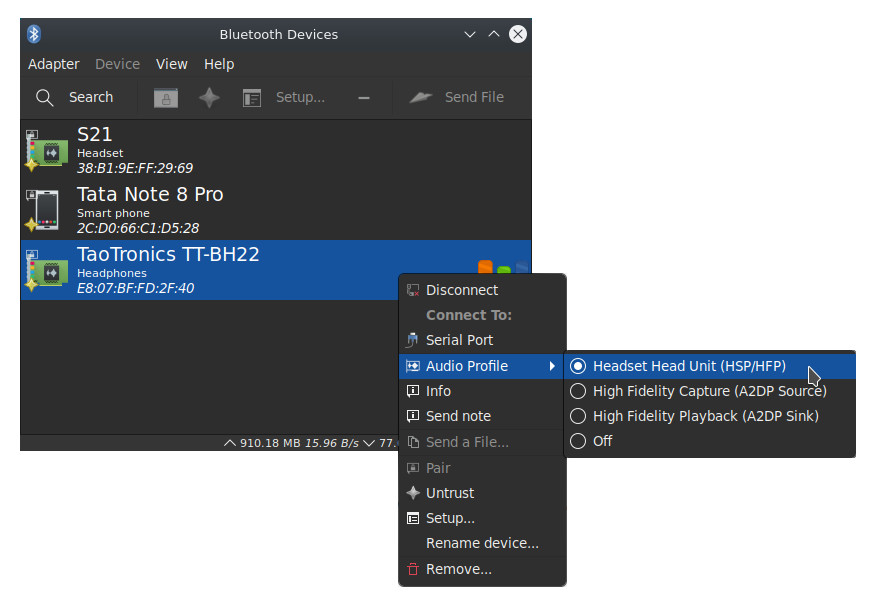
And with this app we can configure our Bluetooth devices better. when we open the app the first thing we see is the list of recent devices.

  • We will locate our headphones on this list and right-click it to see the menu.
  • Will select the option “audio profile” .
  • And finally select the option Headset Head Unit (HSP/HFP).

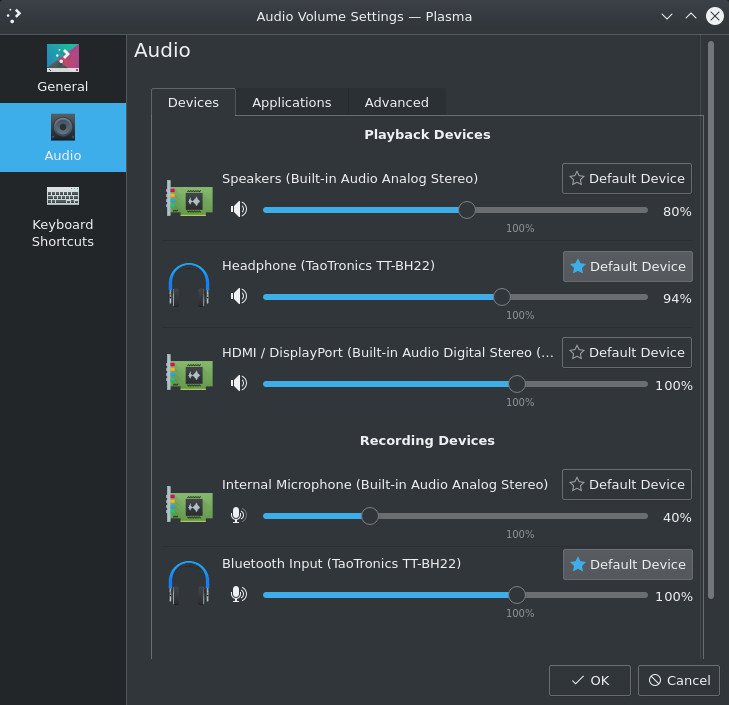
And that’s it, you should be able to see your microphone between the audio device list and select it.

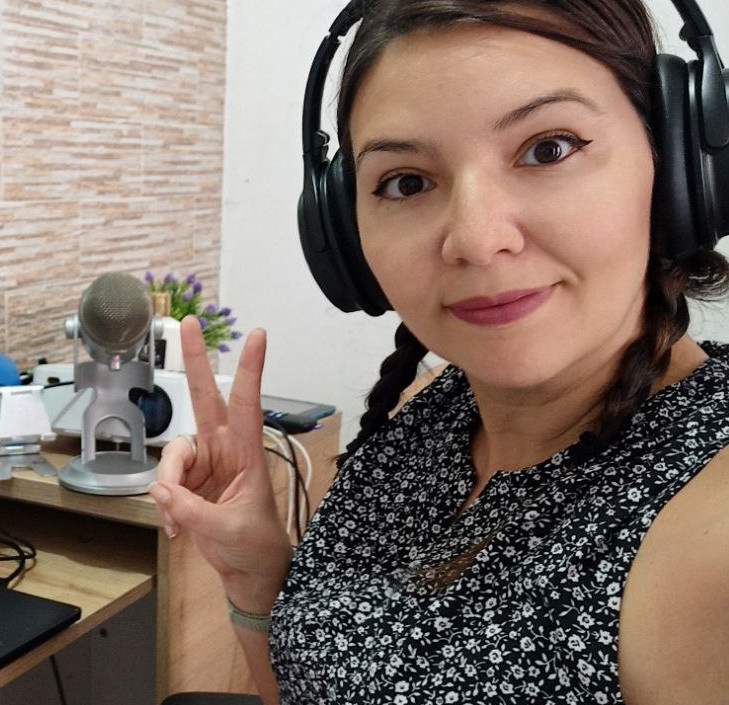
Now this happy girl can walk around the house while makes herself a coffee in between the million meetings we have now during this pandemic.

Let me know if this worked for you, and specially, which headphones did you configured so I can add them to this list.

  • TaoTronics TT-BH22

This post has a nicer formatting that can be seen at it's original source at tatica.org , so feel free to hit the link and read better version!

Si tienes una pc o portátil con bluetooth integrado o USB, esto es para ti!

Descripción de Amora
Amora (Asistente de conexión remota a teléfonos móviles) Es un aplicación que te permite controlar tu escritorio usando tu teléfono móvil. Mediante bluetooth puedes enviar eventos a tu ratón o teclado en las sesiones gráficas. Con el puedes controlar tus presentaciones, películas, o cualquier otra aplicación en la cual puedan interactuar el teclado o el ratón. Amora además incorpora la característica de visualizar un pantallazo desde tu móvil del estado actual de tu escritorio.

Lo que haremos a continuación es realizar la instalación de Amora-server para permitir controlar nuestra maquina usando bluetooth, con el cual podemos mover el ratón, hacer pantallazos, cerrar ventanas, etc. Para descargar el .deb de Amora:

$wget http://amora.googlecode.com/files/amora-server_1.1-1_i386.deb
$su – root
#dpkg -i *.deb
(Leyendo la base de datos …
144787 ficheros y directorios instalados actualmente.)
Preparando para instalar amora-server 1.1-1 (usando amora-server_1.1-1_i386.deb) …
Desempaquetando amora-server …
Configurando amora-server (1.1-1) …
Processing triggers for man-db …
Processing triggers for menu …

Listo! Instalado! Ya nuestro servidor estara a la espera de algun cliente!

Nota: Actualmente fue probado en una distribución venezolana llamada Canaima que esta basada en debian y no tuve problemas con las dependencias.

Ahora debemos instalar en nuestro teléfono celular el cliente del Amora (en este caso, estoy utilizando el Nokia N95) y para ello lo descargamos:

http://amora.googlecode.com/files/amora-client-1.1.0.sis

Lo colocamos en el teléfono e iniciamos su instalación!

Nota: Para la instalación exitosa en nuestro teléfono móvil se requiere de Python for S60 y tuve que instalarlo en la memoria externa del del teléfono.

Si no dispones de Python for S60, puedes bajarte este instalador:

http://amora.googlecode.com/files/amora-client-deps-1.1.0.sis

Luego de instalado, iniciamos el cliente desde nuestro teléfono y desde el server ejecutamos:

$ amorad
Initialization done, waiting cellphone connection…
Entering main loop…

En el cliente Amora, nos dirigimos a Options — Search devices –y seleccionamos el equipo al cual vamos a conectarnos. Nos pregunta sobre el puerto al cual nos conectaremos, pulsamos ok. Iniciar control: Now

Y veremos en el server la conexión del cliente:

$ amorad
Initialization done, waiting cellphone connection…
Entering main loop…
Accepted connection. Client is 00:1C:35:C2:54:8C

Con todo esto, podremos hacer lo mostrado en el vídeo:

Saludos! Y espero sea de ayuda! Pronto postearé como controlar mediante Bluetooth – ssh a nuestra maquina.

ACTUALIZACIÓN – 26/02/10

Para la instalacion del tarball, se requiere de las siguientes dependencias:

  • LIBBLUEZ
  • LIBX11
  • LIBXTST
  • LIBIMLIB2